content top

Seattle Passive House – Air tight or full of hot air?

Let’s have some fun in anticipation of the blower door test next week.  I for one am glad that Dan is pushing the envelope to find out just how much effort and what materials are needed on his project to achieve the Passive House air tight requirement.  I know that many people are following this blog and are interested in the construction techniques that he is using.  I would bet that more than a few wonder for themselves just how much attention to detail is necessary and, for cost and schedule considerations, what is not.

Just to recap, here is part of a comment Dan made recently on the post I made regarding the insulation that was blown in.  (I appreciate the additional information – thanks Dan!)  “When it comes to air-sealing, the approach is a bit of an experiment. Up to this point, I have been using both glue and building gaskets. I will be using tape in a number of locations. (I’m hopefully going to get to utilize some of the famed Siga tape.) When the fateful day of the Blower Door Test arrives (tentatively scheduled for June 29) we’ll know the air-tightness of the different methods. Then I can better approach the balance of effectiveness/materials cost/ installation time for all those future PH Projects.
Nearly every part of the Air Barrier will still be accessible throughout so I can [get] into and out of any leaky/sticky situations. Doughnuts & coffee for anyone who wants to be there for the fateful moment when the pressure’s really on…”

Here’s your chance to share your opinion:

[polldaddy poll=3384866]

Read More

Seattle Passive House – Comfy, cozy is blown through a hose-y!

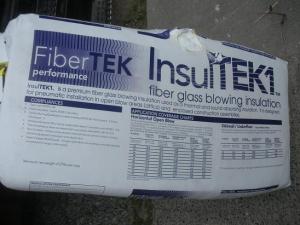
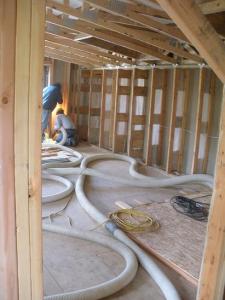
Partners Insulation came out to blow the fiberglass insulation into the walls.  They are using a system called “BIBS” or “Blow in Blanket System”.  The insulation that Dan is using is from FiberTEK and is called InsulTEK1.  This is a formaldehyde free fiberglass insulation product that is blown into place.  The installers ran a long hose from the truck where the hopper and blower were, up through the stairwell and into the 2nd floor.  The first floor Larsen trusses were completely covered with OSB.  The access to the first floor cavities at the plates was wide enough for the hose to be slipped into the cavity and the insulation blown down into the first floor walls.

Here you can see where the 1st floor cavities on the left have been filled and the one on the right has not.  Once the first floor cavities are filled it is time to do the second floor.  The second floor bays are covered with a fabric which is stapled tightly across them.  The installer then introduces a hole near the bottom half of the bay to blow that section first.  The installer then creates a hole near the top of the bay and finishes filling the bay.  For all the requirements of a proper install, please refer to the documentation on the FiberTEK website.

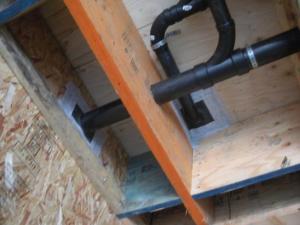
As Dan was showing me around the site he noticed that an airtight seal had been applied incorrectly.  The rubber seal for one of the pipes had been taped in such a manner that there could be air sucked in through the joist connection.  The tape had been wrapped from the ceiling onto a joist, but that joist was not sealed.  Think about trying to tape over a corner of a wall – no matter how tight you try to make it, there is still going to be a void.  Dan removed the grey tape and re-taped the rubber gasket.  The grey tape was some left over “exterior extremely tenacious metal roof sealing tape” that Dan had.  The black was something else he had.  Another step Dan did was to staple through the tape to give it extra holding, but being careful to do that only in the areas that the rubber gasket was not.

After the OSB is put on the remaining walls and ceiling, Partners Insulation will be back out to blow in the attic insulation.  Then the sealing takes place in preparation for the blower door test.  I asked Dan about all the taping and he said he is going to try something different.  He has glued all the joints of the OSB as they were installed and is hoping that he will pass the blower door test without having to tape all the joints.  Sounds like we have a good experiment in the works folks!  Stay tuned for later this month when we see if Dan’s gluing saved him the time of taping or if he has gotten himself in a sticky situation!

Read More

Seattle Passive House – Pre-Insulation is baffling!

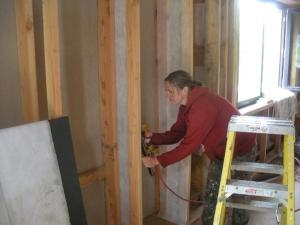
Dan is getting close to a  Passive House milestone – insulation goes in later this week.  In preparation for that cloth baffles are being placed on the Larsen Trusses so that when the insulation gets blown in there will be some control of where it goes.  Here we see Dan’s wife Hillary tightly stapling the baffles into place.

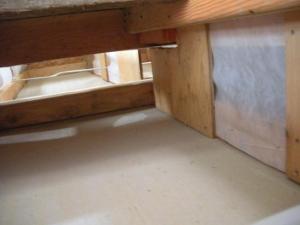
As you can see from the next photo, there is access between the floors at the sill plates.  You are looking up to the second floor from the first floor.  (Note that Hillary did NOT staple the baffles on that bay or it would have been tight 😉  Insulation will be blown in from the upper floor into the lower floor.  Dan and his crew will install the OSB downstairs over the face of the Larsen trusses, but upstairs there will be additional fabric placed over the face and the insulation blown in before the OSB gets installed on that floor.  The OSB will be the airtight layer for the house and once that is installed and the whole building sealed Dan will be ready for a MAJOR milestone – the blower door test!  But first, the wall insulation, OSB, attic insulation, taping all the joints, sealing any openings remaining… still plenty of work left to do!

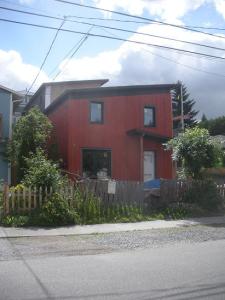
In the meantime, here is a view of the front and back with some siding and color.  It is really looking great!

Read More
content top