content top

Seattle Passive House – The Blower Door huffed and it puffed…

…but did Dan’s house reach 0.6ACH @ 50 pascal?  The answer is a resounding “maybe”.  Between needing a smaller cowl for the blower door (a temporary cardboard one was crafted) and a question of volume it was most likely between 0.5 and 0.7ACH & 50 pascal – definitely in the ballpark.

Dan was really impressed with the Siga tape – thank you Siga!  Albert Rooks of the Small Planet Workshop will be a US distributor for it in the future.

I will post an update with details as they are available.

Read More

Seattle Passive House – Air tight or full of hot air?

Let’s have some fun in anticipation of the blower door test next week.  I for one am glad that Dan is pushing the envelope to find out just how much effort and what materials are needed on his project to achieve the Passive House air tight requirement.  I know that many people are following this blog and are interested in the construction techniques that he is using.  I would bet that more than a few wonder for themselves just how much attention to detail is necessary and, for cost and schedule considerations, what is not.

Just to recap, here is part of a comment Dan made recently on the post I made regarding the insulation that was blown in.  (I appreciate the additional information – thanks Dan!)  “When it comes to air-sealing, the approach is a bit of an experiment. Up to this point, I have been using both glue and building gaskets. I will be using tape in a number of locations. (I’m hopefully going to get to utilize some of the famed Siga tape.) When the fateful day of the Blower Door Test arrives (tentatively scheduled for June 29) we’ll know the air-tightness of the different methods. Then I can better approach the balance of effectiveness/materials cost/ installation time for all those future PH Projects.
Nearly every part of the Air Barrier will still be accessible throughout so I can [get] into and out of any leaky/sticky situations. Doughnuts & coffee for anyone who wants to be there for the fateful moment when the pressure’s really on…”

Here’s your chance to share your opinion:

[polldaddy poll=3384866]

Read More

Seattle Passive House – Comfy, cozy is blown through a hose-y!

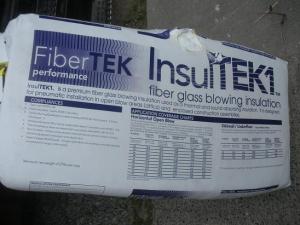
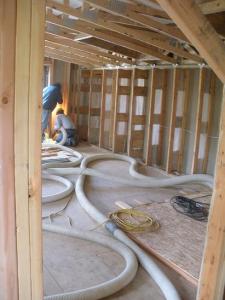
Partners Insulation came out to blow the fiberglass insulation into the walls.  They are using a system called “BIBS” or “Blow in Blanket System”.  The insulation that Dan is using is from FiberTEK and is called InsulTEK1.  This is a formaldehyde free fiberglass insulation product that is blown into place.  The installers ran a long hose from the truck where the hopper and blower were, up through the stairwell and into the 2nd floor.  The first floor Larsen trusses were completely covered with OSB.  The access to the first floor cavities at the plates was wide enough for the hose to be slipped into the cavity and the insulation blown down into the first floor walls.

Here you can see where the 1st floor cavities on the left have been filled and the one on the right has not.  Once the first floor cavities are filled it is time to do the second floor.  The second floor bays are covered with a fabric which is stapled tightly across them.  The installer then introduces a hole near the bottom half of the bay to blow that section first.  The installer then creates a hole near the top of the bay and finishes filling the bay.  For all the requirements of a proper install, please refer to the documentation on the FiberTEK website.

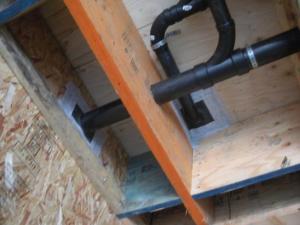
As Dan was showing me around the site he noticed that an airtight seal had been applied incorrectly.  The rubber seal for one of the pipes had been taped in such a manner that there could be air sucked in through the joist connection.  The tape had been wrapped from the ceiling onto a joist, but that joist was not sealed.  Think about trying to tape over a corner of a wall – no matter how tight you try to make it, there is still going to be a void.  Dan removed the grey tape and re-taped the rubber gasket.  The grey tape was some left over “exterior extremely tenacious metal roof sealing tape” that Dan had.  The black was something else he had.  Another step Dan did was to staple through the tape to give it extra holding, but being careful to do that only in the areas that the rubber gasket was not.

After the OSB is put on the remaining walls and ceiling, Partners Insulation will be back out to blow in the attic insulation.  Then the sealing takes place in preparation for the blower door test.  I asked Dan about all the taping and he said he is going to try something different.  He has glued all the joints of the OSB as they were installed and is hoping that he will pass the blower door test without having to tape all the joints.  Sounds like we have a good experiment in the works folks!  Stay tuned for later this month when we see if Dan’s gluing saved him the time of taping or if he has gotten himself in a sticky situation!

Read More

Seattle Passive House – Pre-Insulation is baffling!

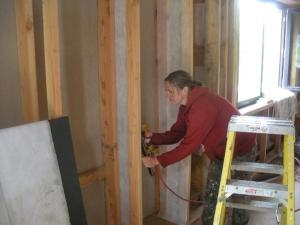
Dan is getting close to a  Passive House milestone – insulation goes in later this week.  In preparation for that cloth baffles are being placed on the Larsen Trusses so that when the insulation gets blown in there will be some control of where it goes.  Here we see Dan’s wife Hillary tightly stapling the baffles into place.

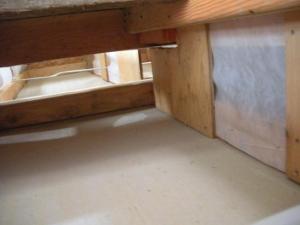
As you can see from the next photo, there is access between the floors at the sill plates.  You are looking up to the second floor from the first floor.  (Note that Hillary did NOT staple the baffles on that bay or it would have been tight 😉  Insulation will be blown in from the upper floor into the lower floor.  Dan and his crew will install the OSB downstairs over the face of the Larsen trusses, but upstairs there will be additional fabric placed over the face and the insulation blown in before the OSB gets installed on that floor.  The OSB will be the airtight layer for the house and once that is installed and the whole building sealed Dan will be ready for a MAJOR milestone – the blower door test!  But first, the wall insulation, OSB, attic insulation, taping all the joints, sealing any openings remaining… still plenty of work left to do!

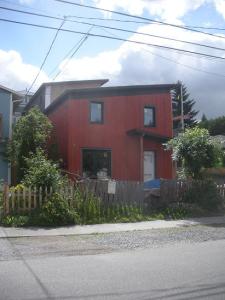
In the meantime, here is a view of the front and back with some siding and color.  It is really looking great!

Read More

Existing Resources – Freedom

Image in the Public domain. http://commons.wikimedia.org/wiki/File:Flags_4.jpg

Monday is Memorial Day here in the United States.  It is a day that we remember the brave men and women who have fought and died for our country.  It is by their service and dedication that we have persevered as a nation and maintained the freedoms that our founders fought for.  Those freedoms are our greatest existing resources.

I would also like to say thank-you to  the men and women who are still alive who have served our country or are still serving our country.  Your service is greatfully appreciated.

Recently I was challenged by a friend who is aVietnam veteran to research the war that I am too young to remember.  He asked me to write a story as a returning Vietnam vet with PTSD and to seek closure in some manner.  It was a very moving experience and one that helped me to understand as a non-participant to some small level what the war meant.  If you are interested in reading the resulting story, “Look Into Our Shadows“, you can find it at my writing blog.

Freedom isn’t free and thank-you seems inadequate for what has been provided for us as a country by the brave men and women who have given their time, their blood, and in many instances, their lives.  Please accept the gratitude offered with the deepest respect for the service rendered.

Thank-you.

-Linda

Read More

Seattle Passive House – Windows can be such a pane in the glass…

Diligence is key in building a Passive House.  Making sure all the details are incorporated as planned is necessary.  When Dan’s windows showed up with the wrong stickers on them there was more than enough heartburn to go around.  Windows are a very important part of the Passive House configuration.  Figuring out where they are located, how much sun they let in (or keep out), how large they are, what their physical properties are in terms of materials & construction are all very important.

As the truck pulled up Dan noticed immediately that there was a problem.  A call to the manufacturer determined that it was most likely a sticker mixup, but just to be sure Dan did not install them until the engineer determined that they were in fact the right windows.  Phew!  I am happy to report that they are in and I have the pictures to prove it.  Dan’s friend Dale even came up from Portland to help put them in.  Additionally there is now a set of stairs to the 2nd floor and I was able to go inside for the first time and I took more pictures.

[slideshow]

If you notice, the windows are not flush mounted to the outside as you would expect.   There is a reason for this.  The windows perform better thermally if they are placed closer to the center of the window well.  There is a program available from the Lawrence Berkely National Laboratory called THERM that can be used to test for the thermal capabilities of construction materials, primarily windows and after testing the position and types of materials, it was found that where the windows are located within the assembly is an important factor.

With the windows in, the Tyvek and siding going up outside, we are getting close to another Passive House feature – the airtight layer.  Dan designed his Passive House to have the airtight layer on the inside of the structure.  He will be using OSB over the larsen trusses on the inside, sealed, and then will blow in dense pack fiberglass insulation into the cavity.  Once the doors are in and any other openings are covered it will be time for the blower door test.   If you want to be sure you don’t miss any updates, you can register for email notification on the right hand side of the page.

-Linda

Read More

Seattle Passive House – Does this make my rear look big?

I had an opportunity to take some pictures of the project from the deck of the house up the hill.  As this is still a construction zone, the backyard is not yet BBQ ready, but it does have a nice amount of space.  You can see the house faces the back of a Safeway store, but the road in front of the house is wide so it doesn’t feel crowded.

The second picture shows just a bit of the side, but you can see the windows in the loft area.  Dan says that there will also be 2 skylights added – one over the stairs and one over the small bedroom.  When I asked how that affected his PHPP figures he said that with good glazing it actually improved since he was able to get additional solar heat gain.

You can see the wet-flash that has been painted around the window openings and Dan told me the windows are coming in a few weeks and will be installed immediately.

Here we are back at street level. In addition to the windows, the Tyvek will be going up soon and the siding.  After that the insulation will be done, the airtight layer sealed and the blower door test performed.  Stay tuned for all the updates!

If you want to make sure you don’t miss any changes on the project, sign up to receive updates via the email subscription button on the right side of the page.

If you would like to see a slideshow of the project I have added a page, accessible by a link at the top of this page, or you can click here.

Read More
content top